 |
» |
|
|
|
|
|
- Print out a copy of this Web page and walk over to the printer you are troubleshooting.
- Enter DIAGNOSTIC MODE.
- Press
 to enter the MENUS on the control panel of the printer. to enter the MENUS on the control panel of the printer.
- Press
 to highlight DIAGNOSTICS and press . to highlight DIAGNOSTICS and press .
- Press to highlight DISABLE CARTRIDGE CHECK and press .
(CAUTION! Failure to exit Diagnostic mode after completing the following steps will cause paper jams and other problems when using the printer.)
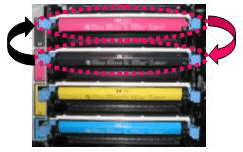
- Open the printer and swap the black cartridge with the magenta cartridge.

(CAUTION! Do not place the cartridges on the transfer belt.)
- Close the printer.
-
Print out another set of test pages.
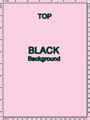
- Look at the black and magenta test pages.
Note that the background colors are switched and no longer correspond to the labels.
- If the vertical line(s) now appears on the test page labeled MAGENTA Background as illustrated below, replace the black cartridge with a new black cartridge.
Otherwise, contact HP.
- Return the black cartridge to the black cartridge slot and the magenta cartridge to the magenta cartridge slot.
- Exit Diagnostic mode.
- Press
 . .
- Press .
(CAUTION! Failure to exit Diagnostic mode will cause paper jams and other problems when using the printer.)
|